

Panel Lab · Level 6 of 10
Commission the sorting station sensors
Level 6 of 10 in the Panel Lab: a free panel wiring exercise at Intermediate level. Wire a 3-wire PNP proximity sensor and a 3-wire NPN photo-eye to the right input groups of a PLC, and prove each one: brown, blue, black, and the sinking and sourcing commons.
Free · no download. Your work is saved on this device. Updated 18 Oct 2026.
The brief
- Work order
- WO-PS-601
- Job
- Commission the sorting station sensors
- Difficulty
- Intermediate
- Type of work
- Commissioning
- Detail
- 26 wires, lockout, meter checks and a PLC program
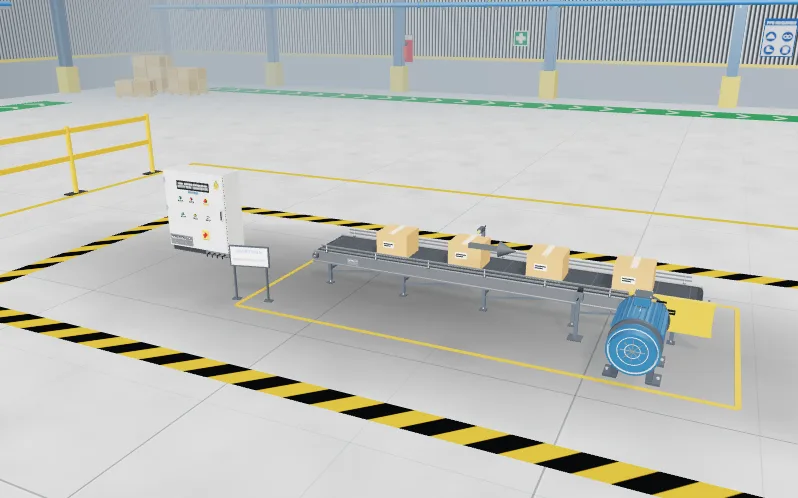
Coastal Packaging Works. Sorting station SS-601 sits on conveyor CV-601 (motor 0.75 kW, 415 V, 1.9 A, direct-on-line starter). Sensor B1 is an inductive proximity sensor, 3-wire PNP, that sees the metal carrier tray arrive at the stop. Sensor B2 is a diffuse photoelectric sensor, 3-wire NPN, that sees a carton at the diverter. The PLC has two input groups: I0.0 to I0.5 on the common 1M, and I0.6 and I0.7 on the common 2M. The panel +S601 has arrived with the power circuit and the 24 V supply wired. The control wiring is yours.
What you do
- Lock out the panel at the main isolator Q1: switch OFF, apply your lock and your tag.
- Prove it dead with the meter, live-dead-live.
- Wire the 26 conductors of the wiring schedule. A 3-wire sensor has brown (BN) for +24 V, blue (BU) for 0 V and black (BK) for the signal. A PNP sensor switches +24 V onto its black wire, so it goes to a group whose common is at 0 V (a sinking card). An NPN sensor switches its black wire to 0 V, so it goes to a group whose common is at +24 V (a sourcing card).
- Common 1M goes to 0 V (W15) for the PNP group. Common 2M goes to +24 V (W16) for the NPN group. Do not put the NPN sensor on a 1M input.
- Read the supplied PLC program. The carrier at B1 stops the conveyor. Sensors are not safety devices: the E-STOP stays hardwired in the coil circuit.
- Restore power: tick the checklist, remove your tag and lock, switch Q1 ON, put the PLC in RUN.
- Test: watch the sensor inputs with nothing in front of the sensors, then hold each target in front of its sensor (press and hold the target button on the sensor). Then run the FAT.
What the test checks
The factory acceptance test is marked against the panel you built. The level sets out:
- 26 conductors in the wiring schedule
- 6 dead checks before you touch the panel
In this lab
- Lock out and prove dead, live-dead-live
- Wire the backplate from the schematic
- Meter, tester, clamp and insulation tester
Levels in the Panel Lab
Previous: Commission the overhead tank pump (Hand/Off/Auto)Next: Commission the variable-speed infeed conveyor drive
- Commission the transfer-pump starter
- Fault-find the outfeed conveyor starter
- Commission the star-delta fan starter
- Commission the reversing conveyor starter
- Commission the overhead tank pump (Hand/Off/Auto)
- Commission the sorting station sensors
- Commission the variable-speed infeed conveyor drive
- Commission the 4-20 mA level loop
- Commission the pneumatic pusher station
- Commission the packing cell (capstone)
Part of the Panel Lab
Lock out, wire, test and fault-find a control panel, then prove it with a factory acceptance test.
Feeds these internships: Control Panel Design and Wiring, Commissioning and Maintenance, Instrumentation and Process Control.