
Testing and fault finding
Multimeter simulator for safe isolation and fault finding
Knowing how to use a multimeter is one thing. Knowing when it is safe to put the probes on is another. EDWartens Lab teaches both: you lock out, prove dead, then measure and fault-find on a panel where every reading comes from the circuit you are working on.
Open the lab freeSee the whole lab
Free with a free EDWartens account. Runs in your browser. The lab is in beta.
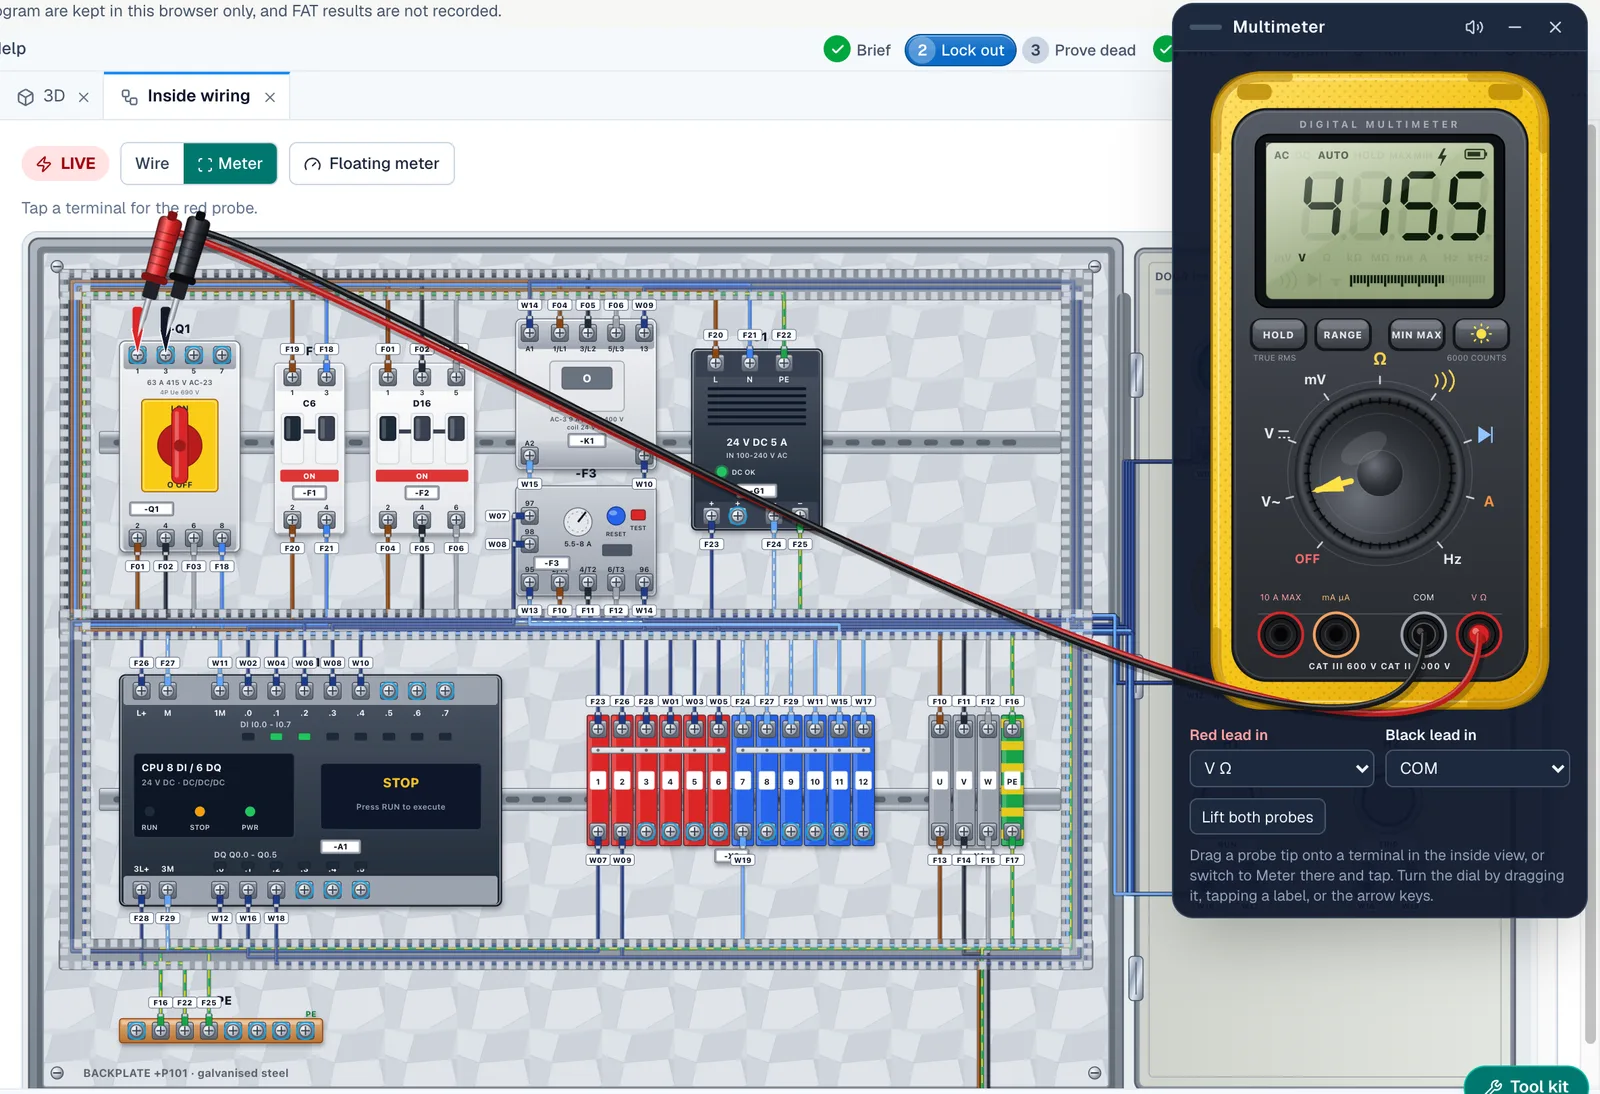
Readings that come from the circuit
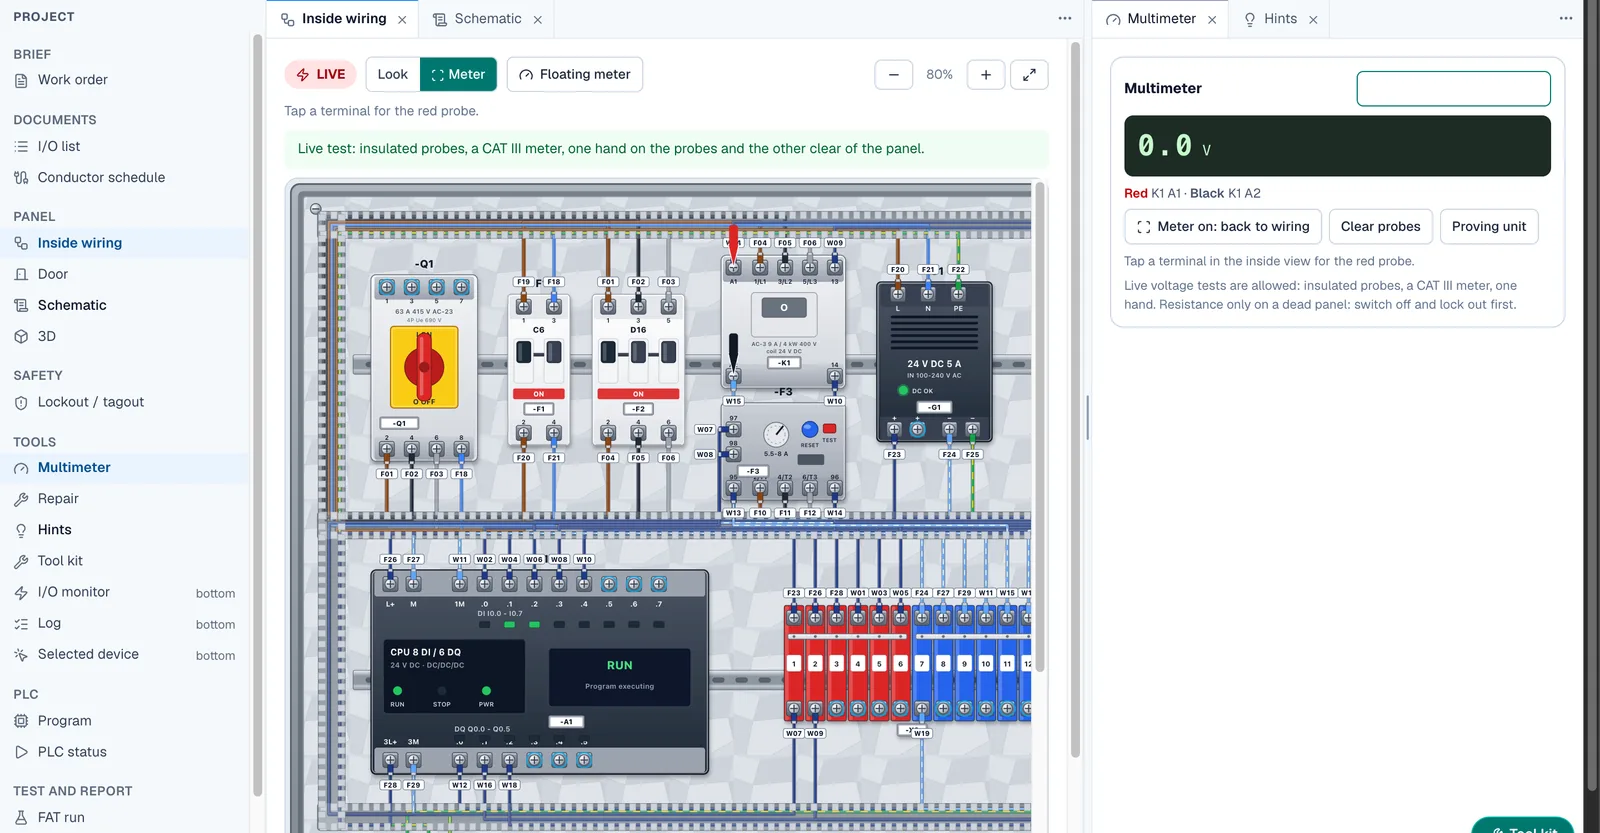
The multimeter in the lab measures volts, resistance, continuity and diodes. You check the dial position and the jacks first, as you would on a real meter, then touch the probes to terminals. Put them on the incoming terminals of a live isolator and it reads about 415 V. Put them across an open coil circuit and it reads what the circuit gives. Nothing is a canned number.
Safe isolation, step by step
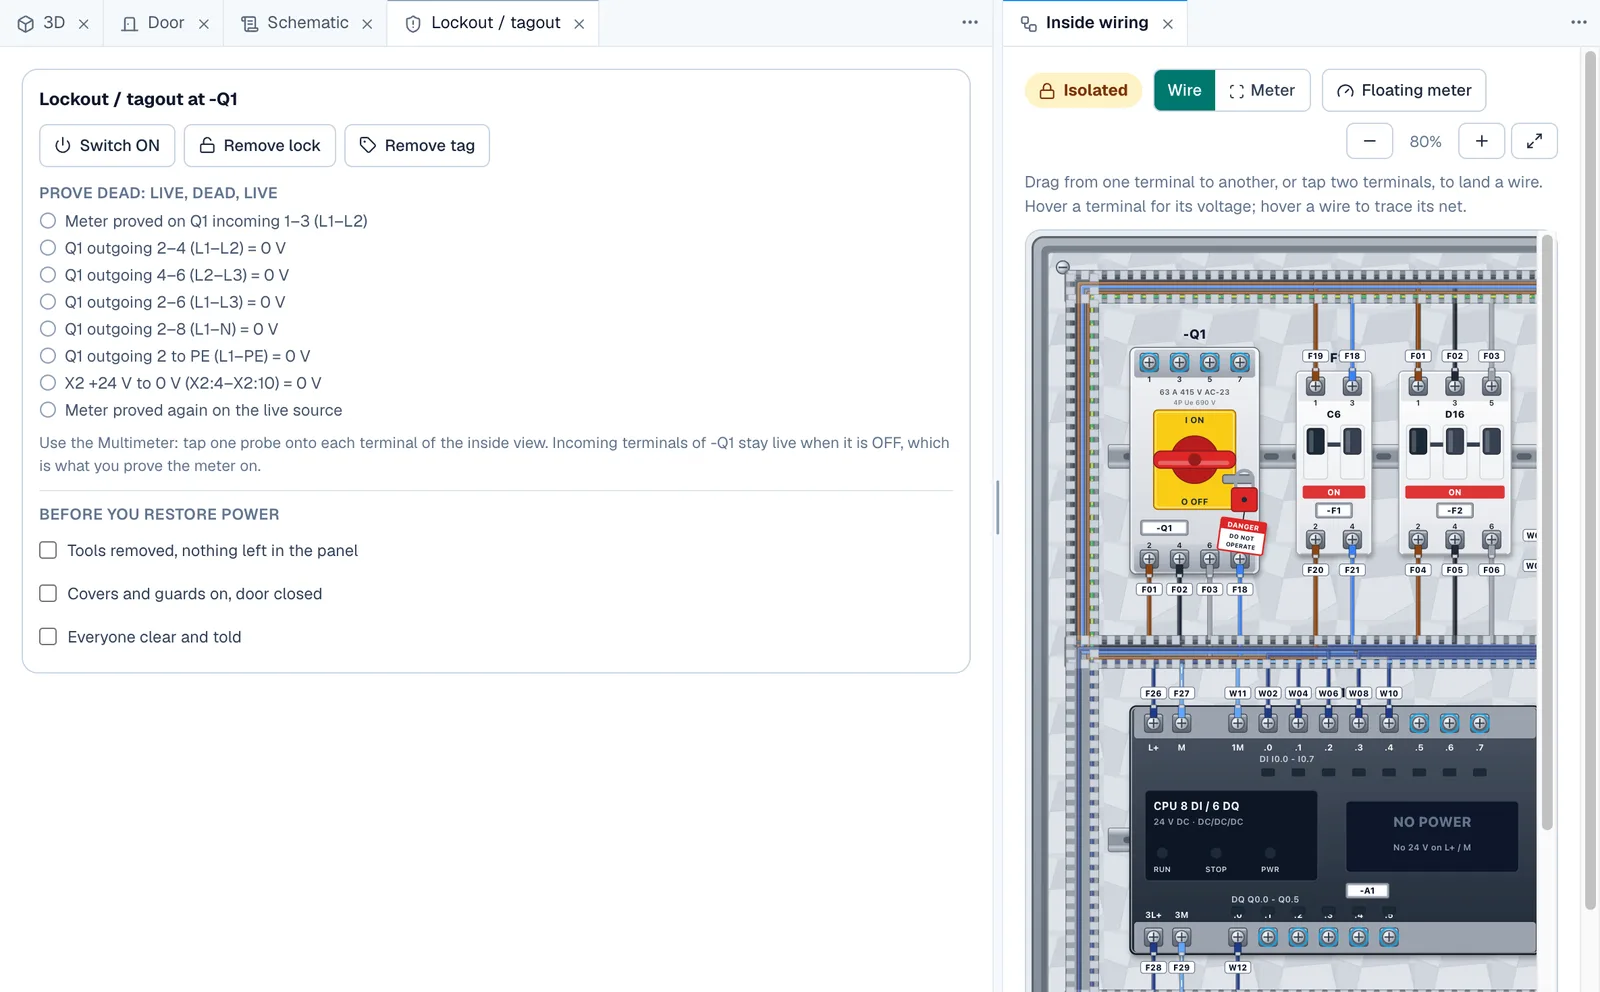
The lab teaches the routine: lock out, prove your voltage tester on a proving unit, test dead, prove the tester again (live-dead-live), then work. A lockout and tagout card lists the steps. The two-pole tester shows an LED ladder, and the proving unit gives a known voltage to touch before and after the dead test.
It is a simulation, so nothing you do here can hurt you, but the habit is the real one.
A tool kit, not just a meter
Beside the multimeter and two-pole tester, the kit has a clamp meter, an insulation tester for locked-out and proven-dead panels, a phase rotation indicator, insulated screwdrivers and a lockout kit. Each is used for what it is for. A clamp meter round a whole cable reads about zero. An insulation test is only allowed on a proven-dead panel.
Fault finding with a meter
Panel Lab level 2 gives you a conveyor starter that has stopped working. You observe the panel, measure live, find the fault, lock out and repair it, then prove it with a factory acceptance test. There are eight possible faults and a different one is drawn each job, so you cannot memorise the answer. You have to measure.
How it works
- Open the fault-finding level and read the work order: the conveyor has stopped working.
- Observe the panel, then measure live with the meter, working from the supply towards the fault.
- Lock out, prove dead and repair the fault.
- Restore power and run the factory acceptance test.
Labs to open for this
- Fault-find the outfeed conveyor starterPanel Lab · Fault-finding
- Commission the transfer-pump starterPanel Lab · Commissioning
- Commission the star-delta fan starterPanel Lab · Commissioning
Browse all labs (free account needed to open them).
Questions people ask
Is there a multimeter simulator for electrical fault finding?
Yes. The Panel Lab in EDWartens Lab has a multimeter, a two-pole tester and other tools whose readings come from the circuit you wired. It is free with a free EDWartens account and runs in the browser.
What is live-dead-live testing?
It is the proving routine before working on equipment: check your voltage tester works on a known source, test the equipment dead, then check the tester on the known source again. It shows the tester did not fail during the test.
Can I learn lockout tagout online?
You can learn the sequence and practise it in a simulation: lock out, tag, prove dead. It does not replace the training, permits and procedures your employer or site requires.
How do I troubleshoot a control panel with a multimeter?
Observe first, then measure from the supply towards the fault. Check the incoming voltage, the control supply, the coil voltage and the contact states. Lock out and prove dead before you touch conductors or replace any part.
Related guides
- Control panel wiring simulator
- Motor starter simulator (DOL, star-delta, reversing)
- Free online PLC simulator
- EDWartens Lab: the free virtual PLC lab